I have been slowly gathering parts for new and improved version of my mini-quad. Changes are being made based on what I learned from the first build and also information I have picked up on the forums over the past few months. While I have made several changes to the frame setup (more on that later), one of the biggest changes is to the power system I will be using for Version 2. Below is a break-down of the components I have chosen based on research of forums and seeing what has worked for others.
Below: motors, ESC's, voltage regulator, battery and flight controller

Motors: Cobra Motors CM2204 1960kv. These are about the same price as the SunnySky 2204s however they are a lower kv since I am going to a 4s battery pack. When I first saw the pictures of these online, I didn't expect them to be high quality, but after getting them in hand they seem to be very well made. Not to mention people seem to be getting pretty good performance out of them. I have HQProp 6030's on here for the pictures, but I plan to try the 6045's too.

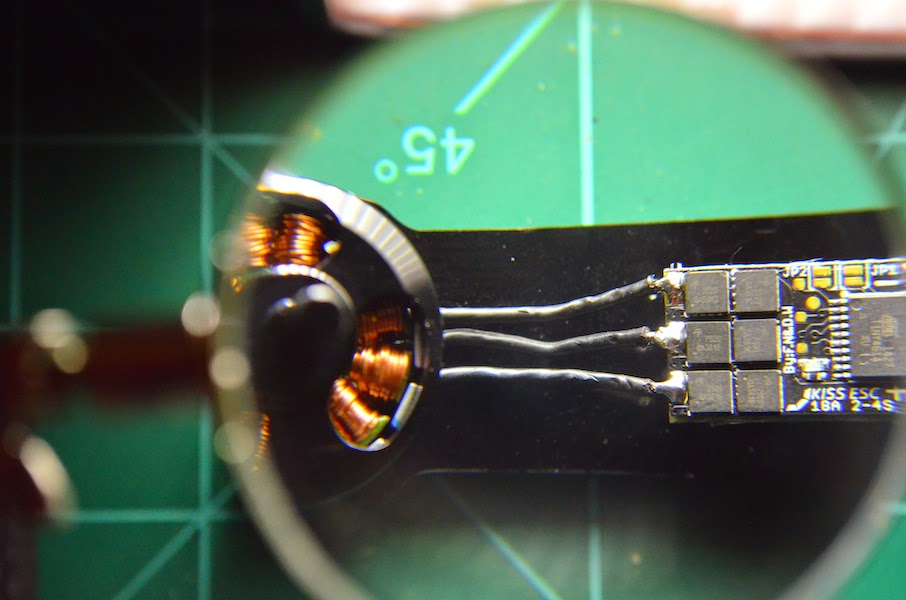
ESC: Flyduino KISS 18A 2-4s capable, these suckers are tiny tiny. It's going to take some patience to solder these up, but they should be worth it. Everyone who has them says they perform like no other ESC's on the market right now, and the FETs are supposedly pretty high end.

Flight Controller: still using the Naze32 acro, although this one is black and I soldered the pins differently. I saw twitchity do this to save some space and liked it. I am also going to clock this board 90* when I install it this time because I had to remove the battery from the airframe to get to the USB the way I installed it in the prototype mini-quad.

Battery: Thunder Power RC 1300mAh 4s 70c G8 Pro Force. For size comparison it is almost identical size/weight to the 1800mAh 3s I was using. This should keep the overall weight of the copter the same but provide better max thrust. I am hoping the flight times will be similar because it is only slightly less watt hours than the 3s pack, however the new motor and prop combo will also effect that.

Prepping the ESC's: I found it easier to use the magnifying glass on the helping hands to tin the pads. I began by putting a little flux on each pad, which is hard to see in the photo.

Tinning the pads: in this photo I have tinned the power, ground, and signal pads. Probably going to use 20awg for the power and ground, and 26awg for the signal wire. I need to put in an order for those materials this week.

All 4 ESC's are ready to be soldered

Motor Connection: Originally I was thinking about nesting the ESC's in the dirty frame like I did on the first build. However I decided against it because these ESC's don't have heat sinks and I'd rather avoid finding out the hard way that they didn't get enough cooling. Instead, I have soldered them close to the motor in the airflow of the prop. The short motor leads I believe have lacquer coating which has to be burned off. I applied my soldering iron for a while to help burn off the lacquer. I used a meter to check the resistance between leads and compared it to one of the cobra motors that still had the factory extension wires in place. Both motors measure the same resistance in ohms so I hope that is a good enough test.
Securing the ESC: At this point I was just testing out some heat shrink I had to see if it would shrink tight enough around the ESC. I have plenty of this stuff left, so I will cut this back open to finish the power and signal wires later. Although I am considering trying to find some thinner clear heat shrink so I can see the LED on the ESC's.

Now only 3 more ESC's and motors to connect!
No comments:
Post a Comment